It doesn't feel like it's been a week at all. I feel like it's been about a month. There have been ups and downs but I also learned and realized a lot of things. But I have to say, the week ended on a great note!
Now I must plan plan plan and grade papers. At least it's a 3 day weekend!
I love buying new clothes to wear for the new school year. I bought a cute dress at Anthro my friend Ari saw. It matches my classroom theme and has hot air balloons all over it! I LOVE IT!
I REALLY want these:
Have a great weekend bloggers!
Pages
▼
Friday, August 31, 2012
Friday, August 24, 2012
We thank you very sweetly
Random, I know. I'm taking a quote from The Wizard of Oz. As the Munchkins in Munchkin Land would say, "We thank you very sweetly, for doing it so neatly." Hm, I may use that this year when my students write neatly. :)
Last night I went to a free screening of the old classic at
The Texas Theatre in Oak Cliff.
It's a historical theatre that opened in 1931 and has some interesting history, including a Lee Harvey Oswald connection! Anyway I'm on the Yelp Elite Dallas Foodie group, and I was invited to watch, have free popcorn + drinks, and dress up! I was kind of disappointed that not many people dressed up (I counted 6 including my friend and I) but I had fun because I was sooo stressed that day with everything going on at school. I didn't even have time to braid my hair, but it was still fun to dress up!
My friend Sarah as the "Wicked Witch of the West." She even made her own headband with green sequins and tiny witch's hat!
So clever!
My silver shoes as Dorothy.
Me as Dorothy Gale.
Right before Back to School Night, I took some pictures of my classroom finalized. Now I have to spend the weekend getting ready for the first week of school!
Boggle game for Word Work in Daily 5!
My desks are grouped into 6 continents. No one lives in Antarctica. :)
My reading nook.
Book boxes for their Good Fit Books!
My desk won't be this clean again until the last day of school! :)
My white board.
This wall will be for their writing assignments.
My class fish! They look excited for the first day too!
I just loved seeing all my kids from last year and how much they've grown. I teared up several times seeing my "guppies." I saw 10 of my old kids from last year. My super shy student even came up and gave me a hug! I missed them so much!!!
It's so funny because I am just so proud, almost like a mom, when I see them. I know I was just a small part of that growth, but still it makes me proud.
And seeing my new students always makes me anxious because I want to do the same for these group of kids. I want to help them succeed and become better students and better (little) people.
So I was feeling a little discouraged this week for some reason. My teacher friends encouraged me a lot and I know I can do better and be better; I just have to have confidence in myself.
Monday, August 20, 2012
Sushi - Round 2
I love sushi ... a LOT. I tried it when I was about 10 and HATED it. My dad was pushing me to try it, and I took a big piece and spit it out and declared, " I will never like or eat that again!" Haha, I guess there is a fine line between love and hate.
So on Saturday, I went to one of my favorite places, Densetsu with my mom and sister. I've probably been there about 10 times now, so the owner knows me. She was so nice to give us ice cream on the house.
Okay, so I am SO excited about watching the Wizard of Oz on Thursday, especially since I get to dress up as Dorothy. I got a dress for $13 (yea!) and I just need to get silver shoes because:
a) In the book, she wears silver shoes, not red, and
b) I don't think I'll wear red shoes as often as silver.
c) I really want silver shoes!
Good reasons, huh? So I will hopefully post pictures soon, but for now, here is a sneak peak:
I am very old and very tired, so it's time for me to sleep.
So on Saturday, I went to one of my favorite places, Densetsu with my mom and sister. I've probably been there about 10 times now, so the owner knows me. She was so nice to give us ice cream on the house.
Green tea ice cream sundae fried in tempura batter. It was delicious.
And I have to confess, I ate dinner there tonight... BUT, my friend suggested it first, and she's never been there, so it wasn't my fault. :) You can never eat too much sushi.
At school this morning, I got a nice surprise in my teacher mailbox! I had no clue who put it in until later, but it just made my day. I work with such awesome people.. I am very blessed. Thanks Katie!
Bonita Broccoli has a friend now! What should I name him/her?
a) In the book, she wears silver shoes, not red, and
b) I don't think I'll wear red shoes as often as silver.
c) I really want silver shoes!
Good reasons, huh? So I will hopefully post pictures soon, but for now, here is a sneak peak:
I am very old and very tired, so it's time for me to sleep.
Tuesday, August 14, 2012
School, school, and more school
Lately I've had school on the brain. Maybe too much. It's less than two weeks away, so I need to enjoy the few days I have before I get immersed in school life and have a 0% social life! Ha, just kidding. My goal this school year is obviously to be a better teacher and grade every day (third year's a charm right?) but personally, my goal is to not spend so many hours at school overworking myself. I have permission to leave before 7 or 8 and still feel good about the next school day. Let's hope so.
I forgot to post this a few days ago. My co worker's mom works at View Point Bank and they donate school supplies to schools in need. So she chose ours and made us lovely supply bags full of useful things including FOUR hand sanitizers! I always ran out at the end of the year, so I'm super pumped about it!
Thank you Heather's mom and ViewPoint Bank!
Excuse my no-makeup face..
Here are some of my classroom photos. I am nearly done with the room. Now it's on to the more important things like leveling my books, lesson planning, and FILING! Oh, the dreaded filing. But I am determined.
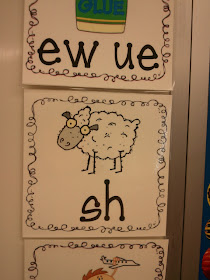
Isn't this cute? I saw someone post a digraph border on pinterest and I absolutely loved this idea! I am going to put my spelling words inside the border and whenever we focus on a digraph, I can just draw an arrow, or take it out of the box and put it in the center! There wasn't any free digraph cards online that I could find, so I painstakingly scoured the web for free clip art and made my own. It took a long time, but it was definitely worth it. All I did was use card stock and printed the cards, laminated them, and hot glued circular magnets on the back. If you are a teacher and would like to use this also, feel free to email me and I would be happy to send you the digraph cards! Beg, borrow, steal!
I had this from last year. These are the 6 traits of writing on hot air balloons, of course. It's hard to see from the photo, but they are hanging from the balloons.
My puppet theatre
Calendar wall
Math stations and manipulatives/supplies
Daily 5 area.
I use the puzzle pieces to write the rules of each station so if they "forget" the rules, they can look!
My math station poster. I will put their names on the balloons and they will choose a continent for a different math station!
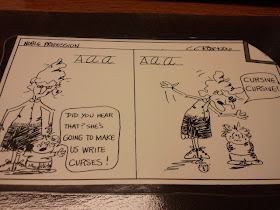
Here's a random cartoon I found in my files..
I hope you enjoyed my classroom photos! I hope this is a great year..
Oh, and Bonita Broccoli could use a friend.. I really want the carrot.
Friday, August 10, 2012
Late night baking
If you love baking and desserts, you must buy this book:
I saw this book years ago at Border's and was so excited to see Dallas restaurant dessert recipes! And they are really good. After a long day at school and against my better judgement, I decided to bake one of my favorite recipes from this book last night at around 10. I would have been baking earlier, but Whole Foods let me down SERIOUSLY. But that's another story. Moving on...
This recipe is courtesy of T Room at Forty-Five Ten, which is apparently a tea room + boutique! What's better than that? I would love to go one of these days!
This recipe only needs 6 ingredients, but you just need a lot of them. It is basically flour, sugar (granulated and confectioners'), butter, pistachios, eggs, and lemons. You also need a tart pan. Here's the recipe:
Lemon Pistachio Tart
Ingredients
For Tart Pastry Dough
2 1/2 cups AP flour
1/2 cup confectioners' sugar
1 cup unsalted butter, chilled and diced
Pistachio Filling
1/2 cup unsalted butter, chilled and diced
1/2 cup granulated sugar
1 cup pistachios (dry roasted, unsalted)
1 large egg
Lemon Topping
6 large egg yolks
1 cup granulated sugar
1/2 cup fresh lemon juice
1 teaspoon finely grated lemon zest
1/2 cup unsalted butter
Hardware needed: 10-inch tart pan with removable bottom, wax paper, parchment paper, rolling pin, pie weights or dried beans, food processor, double boiler or glass bowl/saucepan, wooden juice reamer, flour sifter or sugar duster
Directions:
Preheat the oven to 325°F.
If you bought pistachios in the shell (which I recommend), then make sure you shell it beforehand.
I just realized this is my 2nd recipe with pistachios. :)
1. For the tart shell, in a large bowl, use a whisk to mix the flour and confectioners' sugar together until it is well blended.
2. Take the chilled, diced butter and put half the butter into the flour/sugar mixture.
Now it's time to use your hands! You can try a mixer, but I just think it's better with your hands. You have to cover the butter pieces and smear into the flour. It is important that the butter is chilled because you don't want the butter melting on your fingers.
Put the rest of the butter pieces into the mixture and continue to "smear" the butter until it looks like coarse meal (look at the photo in the middle). You want all the pieces of butter to be fully incorporated into the flour without any lumps. The recipe says "form into a ball," but it won't be like a pizza dough ball.
This is the most time consuming part of the recipe and you need to be patient. Don't get frustrated if it doesn't form a firm ball. Because this tart dough doesn't require water, it won't clump together easily. But I promise, it is so worth it. This is my favorite tart dough recipe. I even use it for other pie/tart recipes!
3. Take a large sheet of wax paper. Lightly flour your wax paper surface and roll out the dough (should be about 1/2 inch thick) until it is a little bigger than the size of the tart pan.
The easiest way to move the dough to the pan is the invert the tart pan (with the bottom) onto the dough, and carefully press down, like you are using a huge cookie cutter. Take away excess dough on the sides (save for later) and then carefully slide your hand under the wax paper to hold the dough and flip the whole pan right side up and you have the dough in the pan! Slowly peel the wax paper off and discard.
Press the dough (again carefully) on the sides of the tart pan, so that you have some depth in the tart. If you accidentally make a hole, just use the extra dough to patch it.
4. Take a sheet of parchment paper and cover the dough. Fill the pan with dried beans as shown below and bake for about 15 minutes or just golden.
I took pictures below to help you:
5. While the tart is baking, make your pistachio filling. In a food processor combine the diced butter, pistachios, sugar, and 1 large egg, pulsing (hold down for 2-3 seconds) for about 30 seconds for a crumbly texture. My processor is a bit small, so it took me longer.
I need to get a bigger mixer!!!
6. Take your tart out of the oven and spread the pistachio mixture evenly on top of the tart. My tart shells tend to not be really deep, so I don't use all the pistachio mixture. It should be a thin layer.
Put it back in the oven and bake for 20 minutes. Let it cool on a rack. It will look like this:
Good enough to eat.. almost.
7. Now for the lemon topping! I love this part! For the double boiler, I use a large glass bowl and saucepan with water. Zest your lemons before you cut them. 1 teaspoon is about 1-2 lemons depending on the size. Put it into the bowl.
Cut the lemons in half. I use a juice reamer (easier than squeezing and you get more out of it) and I used exactly 3 lemons. Don't worry about seeds or pulp. You can pour the juice via any fine mesh strainer into the bowl.
8. Combine all these in the glass bowl: lemon zest and juice, sugar, butter, and 6 egg yolks (save the egg whites for a nice egg white, mushroom and cheese omelette!)
Whisk this mixture continuously over boiling water until the mixture thickens coating the back of a spoon. This takes a lot of practice to get it to the right consistency.
9. Using oven mitts (it's hot!) remove the bowl from the saucepan and put it in the refrigerator to chill for about an hour. Once it sets, pour it over the tart and put it back into the refrigerator and chill overnight. Sprinkle confectioners' sugar over the tart and decorate with a lemon slice.
And here it is!
This recipe is so worth making; I've made this I don't know how many times. Again, not the healthiest, but isn't dessert supposed to be indulgent? :)
Tuesday, August 7, 2012
Stripes and Lace
So everyone that knows me, knows that I LOVE STRIPES. Recently I have also been crazy about lace.
So naturally I had a mini heart palpitation when I saw a top at Anthropologie with stripes and lace!
My two favorite things together! AND on sale! Woohoo!
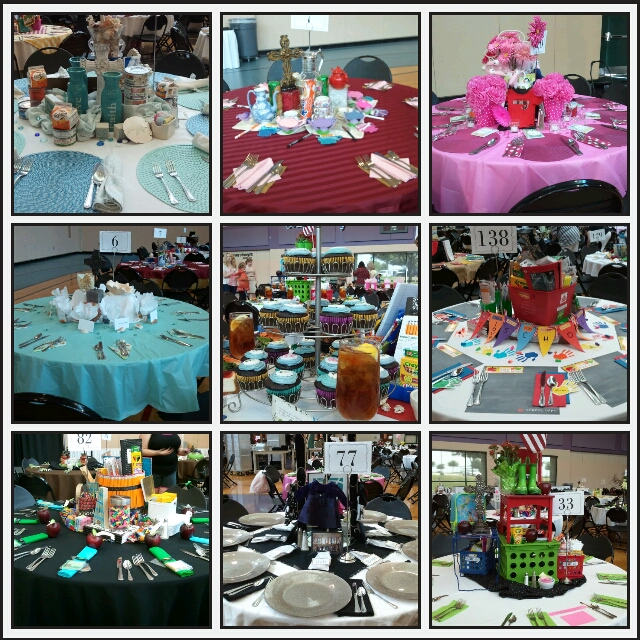
Last week I got to go to my first Friendship Dinner at Prestonwood and it was so much fun! I met such nice people and the table decorations were amazing!
So naturally I had a mini heart palpitation when I saw a top at Anthropologie with stripes and lace!
My two favorite things together! AND on sale! Woohoo!
I only got the top in the middle.
Last week I got to go to my first Friendship Dinner at Prestonwood and it was so much fun! I met such nice people and the table decorations were amazing!
Of course the school themed tables caught my eye. :)
School is about to start up soon which means my baking, reading, etc will go on the back burner. Hopefully my blog won't suffer :) August is an interesting month, because I have so much to buy, and yet have so little money! Haha. I saw these cute notebooks at Target, but it was too pricey for me.
It's a very quaint design.
I am hoping to put up teaching stuff I do throughout this year on my blog, which was my goal other than putting up recipes. My room is coming together slowly but surely. For those of you who don't know my room theme is Traveling Around the World, because I love to travel! It's been about 4 years... I was thinking maybe in a few years I could change my theme to food; or Wizard of Oz? I love my theme for now!
I saw this on pinterest! I love how it turned out. VERY functional
My kids absolutely LOVED word work and literally cover my whole white board with words. They would ask me every single day if they could erase what I wrote or if they could actually use my board, so now they can actually have their own space! Yea!
.
The wall next to my desk. Do you see my light turquoise lamp? It was originally black, but I spray painted it!
My book boxes with Passport labels.
My curtain cover for my table. It hides the mess. :)
My old ribbon trim was fraying BADLY, so I changed it to this cute striped one.
These days I've been realizing many things. I always thought that if this thing happened, or if I just have this, I'll be happy or everything will be great. But I have to take life as it comes and be grateful in all circumstances. I certainly have a lot to be thankful for. So no matter what may happen, I know I shouldn't be afraid.
Saturday, August 4, 2012
Nutella & Pistachio Bomboloni
I found this amazingly easy and delicious recipe online! It's called Bomboloni, an Italian version of donut holes. I saw a Nutella version on Pinterest, and the original recipe fills it with raspberry jam, but I decided to add pistachios because:
a) I love pistachios!
b) I had some on hand, and
c) Chocolate, hazelnuts and pistachios in a warm, crispy on the outside, soft and moist on the inside donut hole?! Yes, please!
This can be made ahead of time, and then fried when you need them.
Sorry I forgot to take pictures at each step; I was so excited!!! I will do that for my next recipe!
Nutella & Pistachio Bomboloni
Ingredients
1/2 cup plus 1 Tablespoon lukewarm water
- 1 1/2 envelopes active dry yeast (3 1/4 teaspoons)
- 1 1/2 Tablespoons honey
- 3 cups AP flour, plus more for dusting
- 3 Tablespoons milk
- 6 large egg yolks
- 1/3 cup granulated sugar, plus more for rolling
- 2 teaspoons kosher salt
- 3 Tablespoons unsalted butter, softened
- 3 cups canola oil, for frying
- 3/4 cup of Nutella
- 1/2 cup roasted unsalted pistachios (shelled)
- Confectioners' Sugar, for dusting
Hardware needed: stand mixer (or hand mixer), food processor, measuring cups/spoons, silicone spatula, bowl(s), plastic wrap, large saucepan, rack (ie. cookie rack), paper towels, rolling pin, round biscuit cutter (about 1" diameter), candy thermometer*,spider skimmer, pastry bag +
donut tip*, and powdered sugar shaker
Directions:
1. In your stand mixer, mix the first three ingredients (water, yeast, honey) and 1 cup plus 2 Tablespoons of flour in the bowl with a whisk attachment (You could also whisk by hand).
Cover the bowl with plastic wrap and let it stand at room temperature until it becomes foamy (it usually takes about 45 min. - 1 hour).
2. If you detached the bowl from the mixer, return it to the mixer and attach a dough hook.
Add the remaining 1 3/4 cups plus 2 Tablespoons of flour along the sides of the bowl.
Add milk, egg yolks, 1/3 cup of sugar and kosher salt. Mix at the lowest speed until just blended.
Then add butter and go to medium speed until it looks silky and sticky, about 5 minutes (dough won't pull away from the sides of the bowl).
3. Use an oiled silicone spatula to scrape the dough into an oiled bowl. Cover this with plastic wrap and refrigerate overnight. The dough won't rise.
4. Pour the 3 cups of oil into a large saucepan and heat the oil to about 360° (medium heat).
I used a candy thermometer to get the oil between 360°-375° ( It is important to keep it between those temperatures because it will brown the outside too quickly if it's too hot, and won't cook if it's too warm).
5. Meanwhile, line the rack with plenty of paper towels. Set up a shallow dish with about 3/4 cup of granulated sugar next to your rack.
6. Take the dough out of the refrigerator and roll it out onto a lightly floured surface to 1/2 inch thick.
Using your biscuit cutter, stamp out 35-40 rounds (cut very close together because you won't be able to reroll). I cut very close, so I got about 44 holes.
7. Use your skimmer to place rounds gently into the oil. Fry 8 at a time until outsides are brown (about 4 minutes depending on your heat). Watch closely! I used chopsticks to flip the bomboloni after one side has browned. Drain them on the paper toweled rack and roll them in sugar. I rolled some batches while (keeping a very close eye) the other batch was frying. Finish frying the rest.
8. Take your shelled pistachios and finely chop in a food processor. Make sure it is finely chopped. When I mixed them with Nutella and tried to pipe it into the bomboloni, the nuts kept getting stuck in the tip, and I was feeling sorry I ever added it. Still, I am glad I did.
The pistachios should be chopped more than this. -_-;;
In a small bowl, mix your Nutella with the finely chopped pistachios.
You can use a donut tip* or I used a French Star pastry tip for your bag, and fill the bag.
Poke the tip into the bomboloni (as much as you can) and fill with the mixture, pulling out as you squeeze. Finally, lightly dust with confectioners' sugar!
Look how many there are!! I ate, er, I mean tested out a few while I was frying, and still there was two platefuls!
Oh, and I also fried the remaining dough left. I couldn't roll it again, so I just tossed them in as is. Waste not, want not, right?
Does anyone else see a heart, bird, and the & sign? :)
Honestly, the hardest part was filling the bomboloni and that was my own doing. That and the overnight wait! It was the easiest recipe and super delicious!
I imagine this recipe could be adapted for other interesting fillings.
Yes, maybe it's not the healthiest thing, but life is short! Eat what you want and exercise afterwards!
THANK YOU:
Recipe credit and thanks to Chef Kate Neumann.
THANK YOU:
Recipe credit and thanks to Chef Kate Neumann.


